
30631

As per the statistics, Facebook had 2.2 million active users in the year 2017. This figure looks like an awful lot and it is only going to increase and increase in the coming years. Having a social media presence has become the need of the hour. The social media presence opens new skylines of connection amongst you and your client.
To put it simply, organizations that use online social networking CRM achieve a more extensive scope of audience, visitors and leads in a lesser amount of time when compared with their rivals who utilize a conventional CRM.
When Salesforce’s Service Cloud Einstein feature is successfully integrated with social media, it puts the brilliance of artificial intelligence to work. Usage of keywords, language detection tools and classifiers, ensures that your workforce is immediately alerted to the social media posts that may require immediate action.
These alerts will definitely help your wonderful sales team to understand what your clients actually like or dislike, and what questions do they have regarding your products or your services. You also get an option to respond quickly to a social media post as soon as it is made to facilitate user experience, either with the option of an email, a phone call, or with an online chat session.
Lets discuss in detail, how to integrate your Salesforce CRM with Facebook, the most commonly used social media platform.
Here is a step by step guide to integrate the best CRM with the best social media platform-
Step-1
Login to your Salesforce developer account
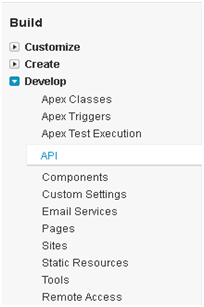
Step-2
Go to the option of Setup in your account, then Select Build and then develop and finally the ‘Pages option’ which is the 8th option as you can see in the screenshot given here-
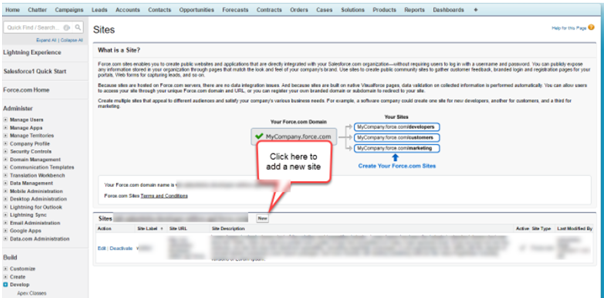
Step-3
Next option is to choose the alternative of ‘New’ from the window that appears, it would be similar to the one given in this screenshot, however, this screenshot talks about editing site option, your pages window would have the similar attributes-
Step-4
Create a Visualforce page in your Salesforce account with the name, let’s say ‘Facebook Integration’, in the field type Facebook Integration. In the name field that is there type ‘Facebook Integration’.
With the help of a screenshot taken from the website of Evernote let us see what the visualforce page window looks like-
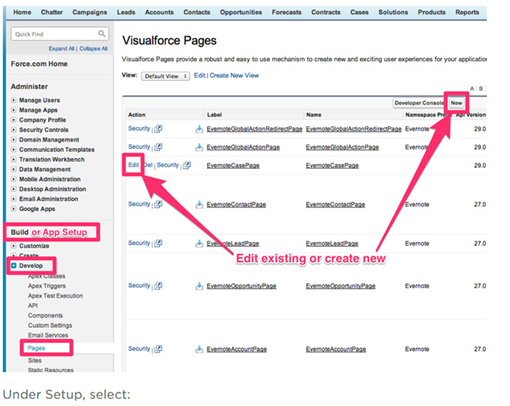
The image clearly illustrates as to where all the options are present in Salesforce Visualforce page window.
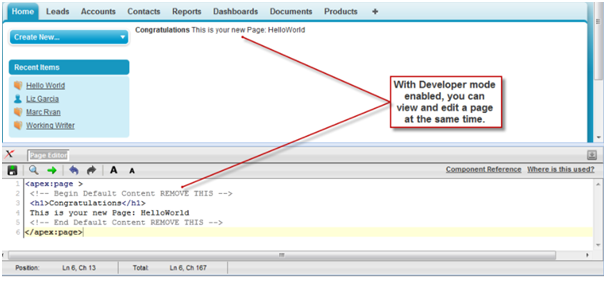
Step-5
You are then required to paste this code as it is given here in the visualforce page editor
<apex:page><div id=”fb-root”></div><script>(function(d, s, id) {varjs, fjs = d.getElementsByTagName(s)[0];if (d.getElementById(id)) return;js = d.createElement(s); js.id = id;js.src = “//connect.facebook.net/en_US/all.js#xfbml=1″;fjs.parentNode.insertBefore(js, fjs);}(document, ‘script’, ‘facebook-jssdk’));</script><apex:pageBlock title=”facebook Integration” mode=”edit”><apex:pageBlockSection title=”facebook Comment Block”><div data-href=”http://example.com/comments” data-numposts=”5″ data-colorscheme=”light”></div></apex:pageBlockSection></apex:pageBlock></apex:page>
The screenshot taken from the website of Salesforce depicts the window that will appear to you while you are editing your Facebook Integration field, it will be something similar to this only-
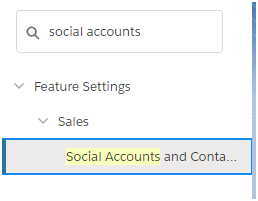
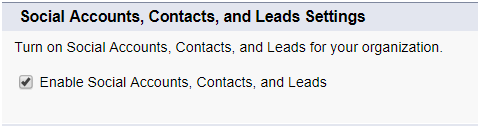
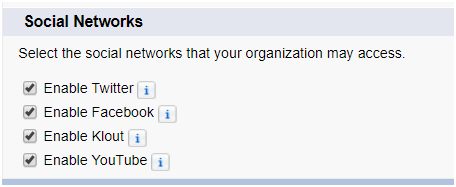
This is definitely a long-lasting way to integrate your Facebook account with your Salesforce account. However there lies an easier way as well for this, for the beginners i.e. Quick find method. Let us see the step by step approach how it works actually –
Quick find Method
Here are the steps you need to follow to integrate Facebook with Quick Find method-

Final Words
Well, I hope I have given you a better day by making your Facebook and Salesforce integration easy. These are some really easy steps to follow and I believe that the screenshots of the live window of Salesforce while editing the options has broadened your view and understanding.
© 2026 Copyright - JanBask.com | Designed by - JanBask Digital Design


Write a Comment