How to Customize Salesforce’s Lightning Experience?
Salesforce lightning is an upgraded version of Salesforce Classic, and it consolidates Lightning segment system with extra contraptions for developers which makes it smarter. Salesforce Lightning was introduced to make things faster than ever in the Salesforce environment. Today we shall talk about customizing Salesforce’s Lightning Experience. The blog covers the following topics-
What is Salesforce Lightning Experience?
Salesforce Lightning knowledge is an advanced, quick, and astute UI built with demonstrated Salesforce1 Mobile Appinnovation. It joins Lightning Designing System (LDS), Lightning application manufacturer and Lightning Components to make present-day venture applications. Salesforce Lightning background is another age beneficial UI intended for Sales group and Support groups in Salesforce.com. Salesforce1 have been presented for portable application, and Salesforce.com has presented two UI for work area form Salesforce great and lightning Salesforce.
Lightning Experience (or LEX for short) carries with it a completely new customer side design, which leaves from the server-side rendering for its forerunner (Salesforce Classic) and Visualforce gave. For in reverse similarity, Visualforce UIs can, in any case, be utilized inside Lightning Experience, even though utilizing Visualforce in LEX won’t offer the degree of extensibility or visual intrigue as custom UIs constructed utilizing the Lightning framework.
Build a Custom Record Page for Lightning Experience
Utilize the Lightning App Builder to include, remove, or reorder parts on a record page to give clients an altered view for each item’s records. Much cooler, you can tweak a record page and allot it to explicit Lightning applications to give your clients access to a one of a kind record page redid particularly for the setting of the application they’re working in.
Just like the Home page, you can make a custom record page in two different ways: Create it sans preparation utilizing a format, or alter a current page. We will make a record page utilizing a format.
Create a Custom Lightning Record Page
Let’s form a custom opportunity record page without any preparation.
We’ll change the standard record page design a tad, so you can discover how things go together. After you’re alright with that, you can get down to business and modify your record pages any way you like. We should begin.
From Setup, enter App Builder in the Quick Find box, at that point select Lightning App Builder.
Click New.
Select Record Page.
Name your page New Opportunity Page and select Opportunity.
Choose the Header, Subheader, Right Sidebar layout on the following screen, and snap Finish.
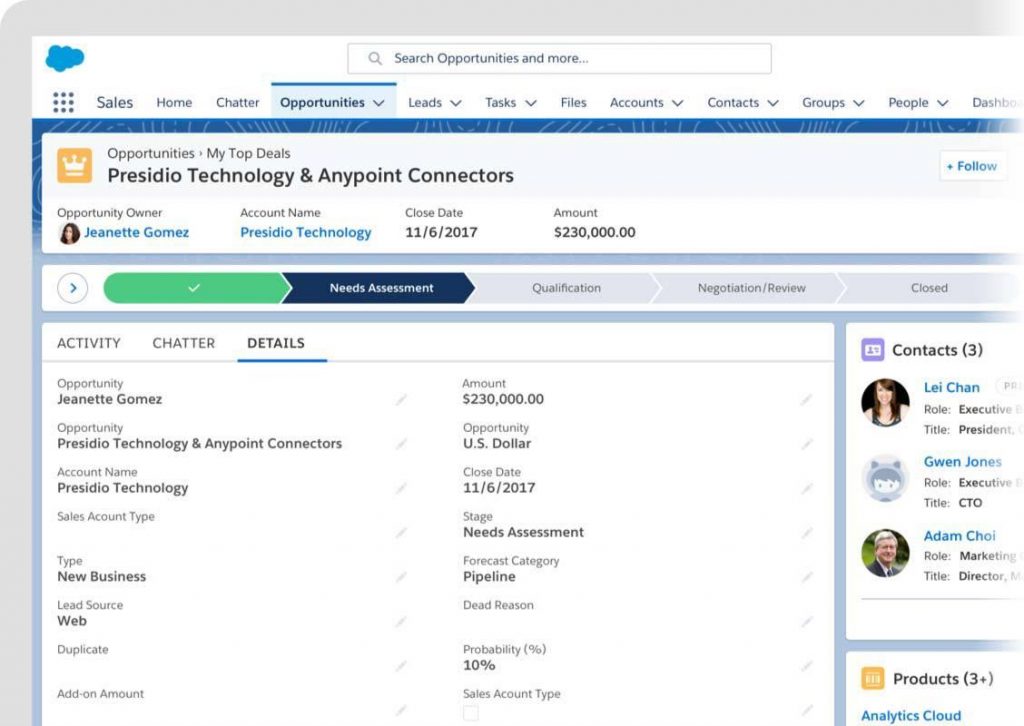
In the segments sheet, you see all the standard parts accessible for circumstance record pages and any custom segments that you’ve introduced in your organization.
Drag the Highlights Panel part into the top locale of the page.
Click See How It Works in the part properties sheet to discover where the features board substance originates from.
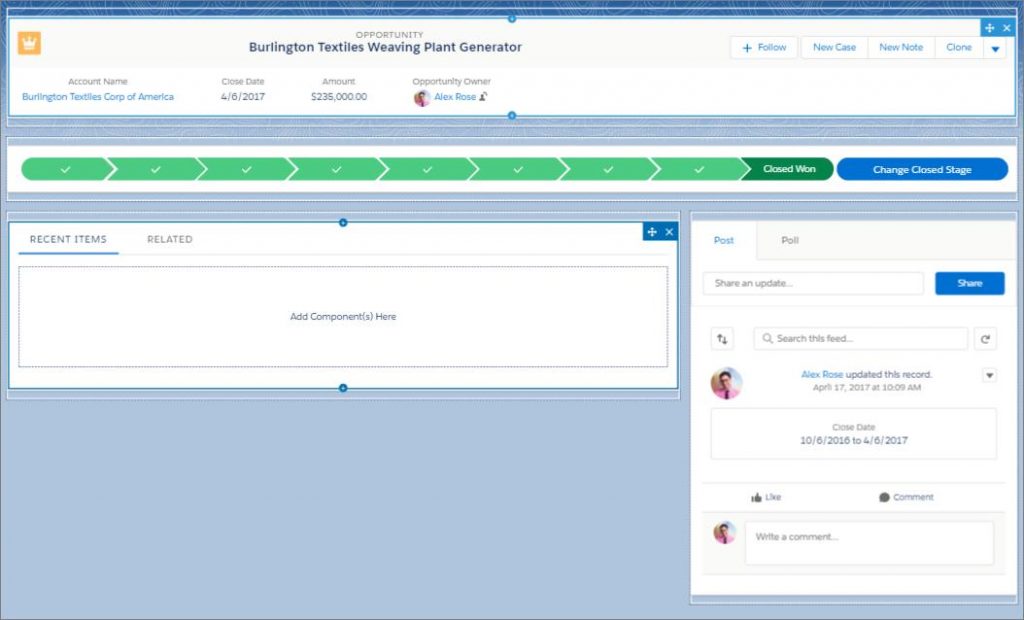
Add the Path segment to the area beneath the features board.
Add a Chatter part to the lower right locale.
Add a Tabs part to the lower-left locale
The Tabs part accompanies some default tabs as of now set up. We should include more.
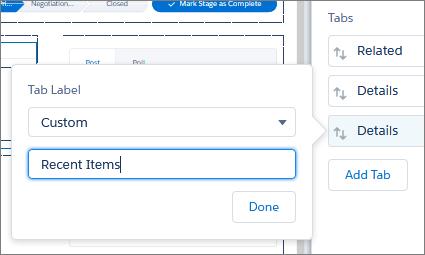
In the Tabs segment subtleties sheet, click Add Tab.
By default, another Details tab is included. But since we as of now have one, we should change this new one to something different.
Click the second Details tab. From the Tab Label dropdown menu, select Custom, and give the tab another name: Recent Items
Click on Done option.
Next step involves creating an Activity tab.
For that, you will have to drag the tab of Recent Items to the top of the list within the properties pane.
The Recent Items tab is present in the principal position in the tabs segment. You can click around between the tabs. However, nothing changes because the tabs don’t have any parts doled out to them. They’re unfilled. How about we fix that.
To add a part to a tab, select the tab on the canvas and after that drop a segment legitimately underneath it.
Select the Details tab.
Drag a Record Detail part directly underneath the Details tab, into the green featured zone.
Add a Related Lists segment to the Related tab, an Activities part to the Activity tab, and the Recent Items segment to the Recent Items tab.
Select the tabs segment on the canvas, and in the properties sheet, change the request of the tabs to Details, Activity, Recent Items, and Related.
You can’t drag the tabs inside the part to move them around. You can just change them in the properties sheet.
Click Save, at that point Not Yet.
Create a Custom Home Page for Lightning Experience
We’ll change the situation of the segments on the standard Home page design marginally to give you a thought of what’s conceivable.
Let’s begin!
From Setup, enter App Builder in the Quick Find box, at that point select Lightning App Builder.
Click New, and select Home Page.
Step through the wizard and name the page New Home Page, select the standard landing page format, and after that, click on Finish option.
The segments sheet contains all the standard segments accessible for the Home page.
Drag the Assistant segment to the upper right area.
Drag Performance to the upper left locale.
Add Today’s Events to the lower-left district and add Key Deals to the lower right area.
Add Today’s Tasks over the Assistant.
Click on Save option.
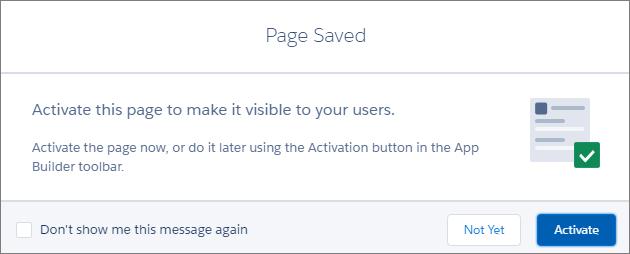
However, pause, what’s this? There’s something more? Truly, there is. Sparing the page isn’t sufficient to get it out to your clients. Lightning pages must be enacted before your clients can see them.
Ordinarily, if you aren’t finished with your page, or aren’t prepared to make it open, you can click Not Yet here to spare the page and come back to the App Builder. Yet, that is not us. We’re striking! We’re finished with our page and need to offer it to our clients at this moment!
12. Click on Activate option, and we’ll do only that.


Write a Comment