Salesforce Live Agent is a native Salesforce tool that provides the ability to chat and interact with customers in real time. Everyone might have seen the “chat to an agent” like messages on the web page of several websites. Through the chat box; the customers can interact with the support team of the service provider in the live environment.
Live chat provides a real-time environment that is desirable by almost every customer. The real-time interaction is done with a real person. This method is used by many companies to provide customer support. Unlike call support from where an agent can handle and respond only one customer at a time, through Live chat one agent can handle several queries of multiple customers at the same time.
Salesforce users have to pay some extra amount to manage customer support through phone calls, while the cost may be minimal initially, but later it may also increase. For Live chat or Live Agent no charges have to pay per interaction, so after setting up the live agent customers only have to pay for agents only. Chat transcriptions can be saved and used to provide free training guides to new agents.
Today in this post we are going to discuss the Salesforce Live Agent setup steps. So far it might be clear to you how it can be beneficial for any organizational website. So let’s jump to our main section.
How to Set up Salesforce Live Chat Agent?
Step 1:
To set up the Live Chat Agent, you should go to
Setup -> Customize -> Live Agent -> Live Agent Setting
Just like shown in the below image:
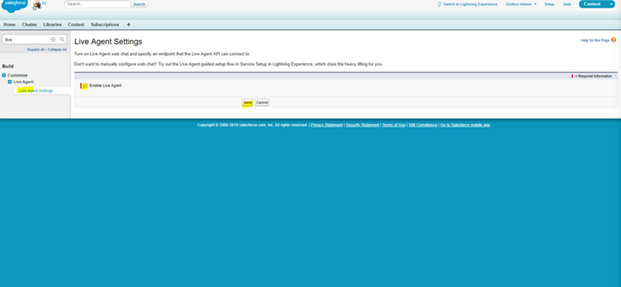
From here click on enable live agent option and then click on save to save the changes. As soon as you will click on save you will see lots of option appeared on the main window, like “Live Chat Transcript” that provides the facility to hold and save chat history.
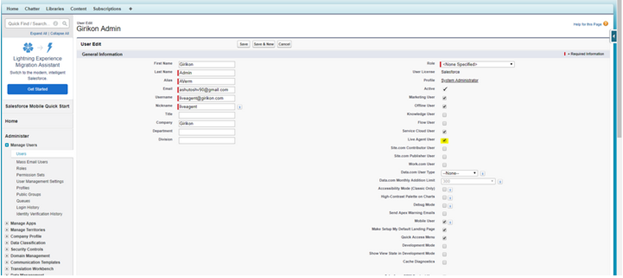
Step 2:
Now when you set up the live agent, this is the time to set up a user account to use Chart feature. For this you can use the following steps:
Setup -> Users - > Select User
You can edit any of the present users to act as a live agent user. Now click on the live agent user and click on the “Save” button to save the changes. Following image shows the steps:
Step 3: Configuring Live Chat Agents
Now after setting up Live chat user account, you need to configure this account. This can be easily done through a configuration option.
Goto Setup -> Customize -> Live Agent -> Live Agent Configuration
Now you should configure the live agent to which you can assign live agent user, their profiles and also provide supervisor setting and chat transfer settings. As shown in the below image:

From here you can also manage chat settings and chat transfer settings.
Step 4: Now when you create the user account and configure it as per requirement, this is the time to create a new skill. This is shown in the below image:
Goto Setup -> Customize -> Live Agent -> Live Agent Setting
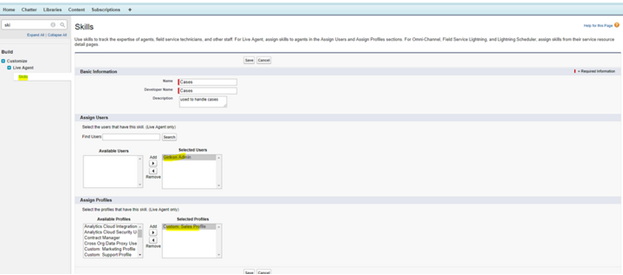
You can add new skills for the user or add new skills as per requirement. After creating the new skill, you can save it as the skill for a live agent.
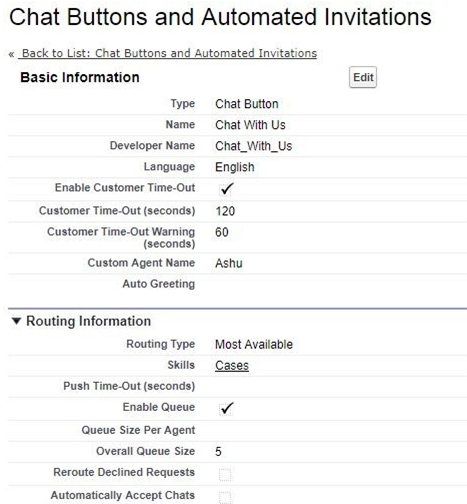
Step 5: Chat Button Setup
Now is the time to setup the chat button.
Go to Setup -> Customize -> Live Agent -> Chat Button & Invitation
You will have to fill up the basic and required information when you will create the chat button. Here you can also customize the chat button and route the basic information. For the public website image, you will have to upload the images that can be used for the offline and online status of the chat window.
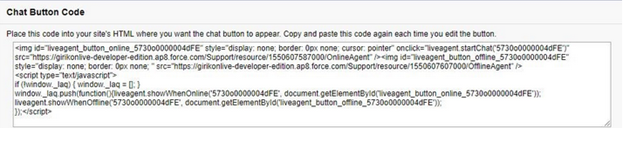
When you will create the chat button and save its settings, soon you will get the chat button code that you can copy and paste into the HTML page of your website.
The code window will look like the following image:
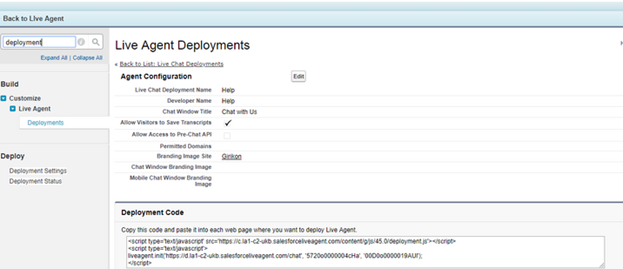
Step 6: Deployment of the Live Agent
Setting up the chat window is a major setup, while after finalizing the setup you need to deploy the agent. Below steps are used for that:
Go to Setup -> Customize -> Live Agent -> Deployment
Now you should create the new deployment and save the settings; As a result, you will again get e deployment code that you need to copy and paste, just below the chat window code. In the HTML section of your webpage, you can add both these codes one under another.
Step 7: Setup Live Agent Console App
User can also create chat apps. A console based app includes live chat agent; here you can also choose records or pages that should be opened as sub-tabs of the chat sessions.
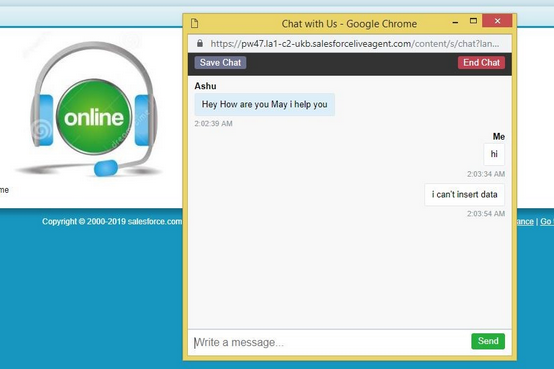
You can also test your chat app setup, for this just open your website HTML page, on which you have pasted the code for chat button and deployment. Here as per the status of the live agent, the image will be changed.
You can click the online image if the agent is online, through this a request will be sent to the agent. He can access that through the console app as shown in the following window:
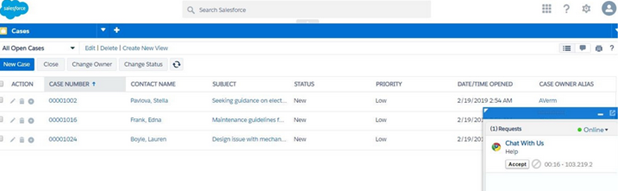
From the console app, the agent will have to accept the request to initialize the chat. This is shown in the following image:
In this way, the agent can easily reply to the customer’s queries.
Some of the Advantageous Features of Salesforce Live Chat Agent
You can easily customize the live chat agent as per requirement and build a robust process around it. Salesforce Service Cloud offers the Live chat tool, and some of the great additional features of Live chat are:
- Sneak Peek: Agents can know what the visitor is typing and in the mean time he can access the knowledge base to provide the detailed and specific reply of their queries.
- Whisper Messages: A supervisor can easily communicate with the agent, when he may be busy in resolving customer’s queries.
- Auto Greetings: Agents can setup the greeting way to their customers and can ensure that it will be done effectively. Moreover, typo errors can be avoided through pre-specified greet messages.
Don’t Wait and Setup Live Chat
Now it should be clear to you, that what is the importance of Salesforce Live Chat agents and how we can set up them? It may cut the cost of customer support and automate several manual processes. To provide something extra to your valuable customers, you can add this invaluable Live Chat support to your website as well.
Ready to accelerate your Salesforce journey?
Talk to a JanBask specialist and get a strategy session tailored to your business.